
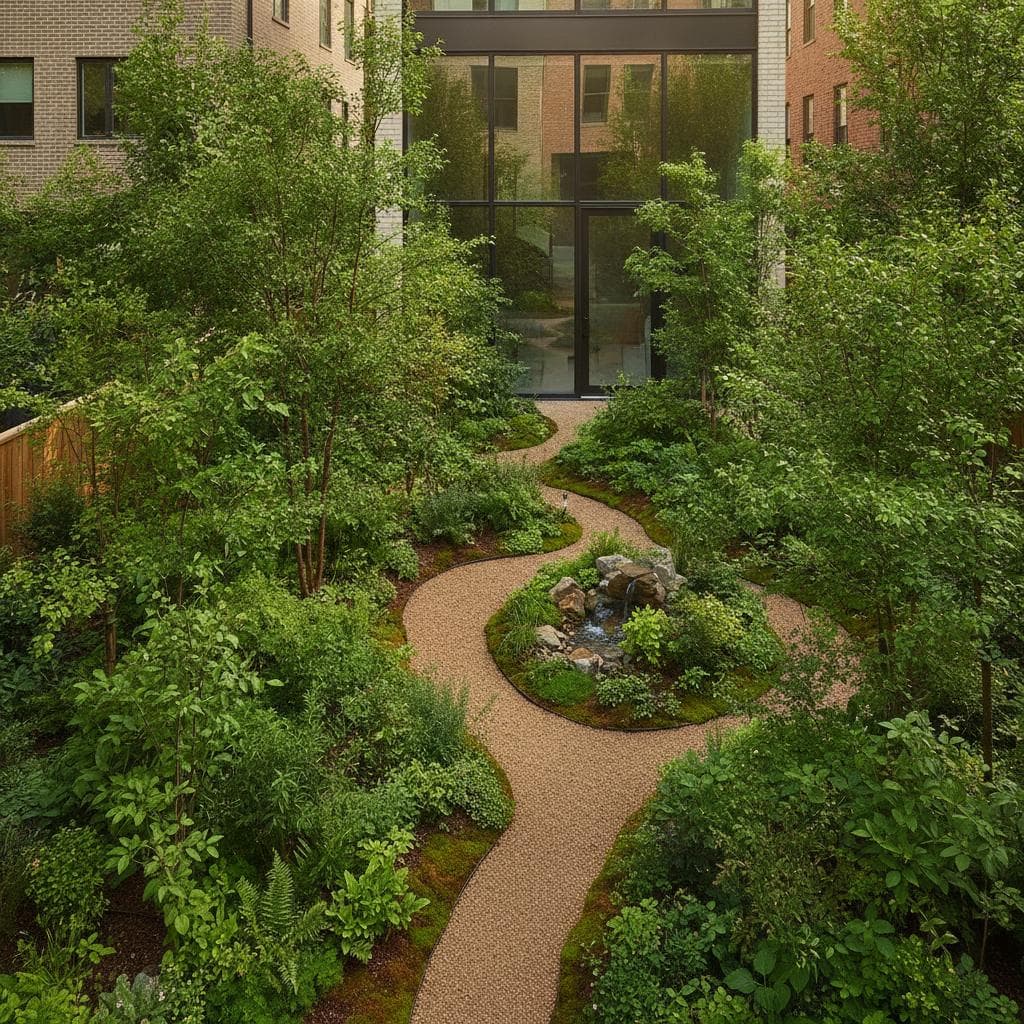
Transform Your Tiny Yard into a Thriving Micro-Forest
Many homeowners assume a small yard limits options to a few shrubs or flowers. The Miyawaki method shows that even limited spaces can support a dense, self-sustaining ecosystem. This approach draws from natural forest patterns to create a compact green space that cools surroundings, supports wildlife, and improves daily life.
What Defines a Micro-Forest
A micro-forest replicates the layered structure of a natural woodland in a compact area. It combines trees, shrubs, and groundcovers planted closely to encourage mutual support rather than rivalry. The Miyawaki method, developed by Akira Miyawaki, accelerates establishment on urban lots through careful species selection and soil preparation.
Unlike a conventional garden bed, a micro-forest is designed to become increasingly independent. Its dense planting shades the soil, reduces evaporation, and creates shelter for insects and birds. The result is a living landscape that feels abundant without requiring a large footprint.
Benefits of Establishing a Micro-Forest
Dense plantings improve air quality, attract pollinators, and lower nearby temperatures. Homeowners gain added privacy, visual interest, and property value. The system also dampens noise and manages stormwater, resulting in a stable landscape that serves both residents and local ecology.
A micro-forest can also improve the experience of a home. Trees soften hard fences, screen neighboring windows, and frame patios or outdoor dining areas. Layered greenery creates changing views throughout the growing season, while shaded ground helps make small outdoor spaces more comfortable.
Core Principles of the Miyawaki Method
Success rests on four elements that mirror natural forest development.
- Select only species native to the region for better adaptation and wildlife support.
- Arrange plants in four vertical layers: canopy trees, sub-canopy trees, shrubs, and groundcovers.
- Plant at high density, three to five specimens per square meter, to promote upright growth.
- Enrich soil with organic compost and mulch instead of synthetic fertilizers.
This layered design also supports interior planning. Taller plants can form a green backdrop, medium shrubs can define circulation, and low groundcovers can soften stepping stones. Repeating a few species throughout the area creates visual unity, even when the planting palette is diverse.
Site Assessment and Species Selection
Measure sunlight patterns and note fixed elements such as fences or utilities. Target a spot that receives at least four hours of direct light each day. Choose a balanced mix that includes fast-growing pioneers and slower climax species suited to local conditions.
Typical groupings include oaks or maples for the canopy, dogwoods for the sub-canopy, viburnums for shrubs, and native ferns for groundcover. Local botanical gardens or conservation offices can supply region-specific lists.
Consider mature size before planting. A tree that looks small at a nursery may eventually interfere with rooflines, walkways, or utility wires. Select compact native varieties where space is restricted, and place root-sensitive species away from foundations and underground drainage. Include plants with different bloom periods so pollinators can find food across the growing season.
Soil Preparation Steps
Loosen compacted ground to roughly one meter deep. Blend in compost, leaf mold, and coarse mulch to increase aeration and water retention. Healthy soil supports rapid root development and long-term plant vigor.
Test the soil before adding amendments, especially near older buildings or streets where contamination may be possible. Avoid excessive fertilizer, which can encourage weak growth and disturb soil biology. If excavation is difficult, build the planting area in raised layers using clean topsoil, compost, and woody material. Good drainage remains essential, since saturated roots can fail even when plants are native.
Planting Sequence
- Clear weeds and turf by hand to expose bare soil without chemical residues.
- Incorporate organic amendments throughout the bed.
- Position taller species toward the center and shorter plants at the edges.
- Space trees about three feet apart and fill gaps with shrubs and groundcovers.
- Spread a thick mulch layer to conserve moisture and limit weed growth.
- Water thoroughly at planting and maintain weekly moisture until roots establish.
- Monitor early growth and replace any losses to preserve density.
Plan paths before planting so maintenance does not compact the soil later. A narrow stepping-stone route can provide access without dividing the forest into formal sections. Keep mulch away from trunks, and use rounded stones or natural edging where lawn meets the planting bed.
Ongoing Care During Establishment
Focus attention on the first two seasons. Water during dry periods, remove invasive weeds promptly, and renew mulch each year. Allow natural competition to shape the canopy rather than heavy pruning. Beneficial insects and birds usually control pests once the system matures.
Inspect plants regularly for broken branches, drought stress, or signs of browsing. Deep, occasional watering is generally more useful than frequent shallow watering. As shade increases, reduce irrigation gradually and allow fallen leaves to return nutrients to the soil. Remove only diseased material or growth that threatens paths, structures, or safety.
Integrating Form and Function
Combine plants with complementary textures and seasonal color. Add stepping stones for access and a simple bench or birdbath to encourage use. Position evergreens along boundaries for year-round screening and define edges with a low border to prevent erosion.
Use the forest to improve the surrounding design. Place a bench where foliage can frame a view, or direct a path toward a small focal tree. Warm wood, natural stone, and muted outdoor lighting complement the informal character of the planting. Keep lighting low and shielded so it does not disrupt nocturnal wildlife.